While approaching the deadline of House of Anubis (game), MediaMonks needed a tool that helps with randomizing tiles. The levels has a huge amount of walls and tiles in it’s library, since it is build in Flash with MovieClips on stage. For the quick win, this simple tool allowed to randomize selected clips on stage with a selection from our library. Of course; to refine it, you’ll need more than just a MovieClip swapping tool, but we love to share this tool with you anyway in case you need it.
When you have a selection with multiple MovieClips, you sometimes want to transform (rotate, skew, move, scale) them all, but individually. By default, Flash will transform them like it is one object. I created a tool for that. Just select some items on stage, call the command and set the adjustments. It is also possible to transform them relative from its current transformation.
This tool is useful for Actionscript developers; it grabs all objects with instance names from the current timeline and outputs a list with Actionscript code in the output-window. Available in two flavors.
This tool automatically renames layers and cleans empty layers. This tool should be used as neurotic as you would use the save-button, and you will have perfectly named layers. We have included a free nazi-tool which detects if you’re using txt or mc as prefix for your instance names, according our MediaMonks coding standards.
Ever wanted to duplicate a symbol timeline with all of its instances? In Flash, if you do a duplicate of a library item, it does not offer to duplicate its children too, you have to do it manually. Another annoying thing; it does not copy the class references. That’s why I created a tool that does it all. It asks you to give a pre- or postfix for the new names, or you can choose to replace parts of the names.
his tool is made to easily assign or change the class of a MovieClip, and uses our naming standards for the linkage names (which is filename dot SymbolName). It also gives you the option to change the instance name over the full timeline and fixes the layer name. The tool has a class-dropdown, pre-filled with Temple-classes, and the classes that are already linked to library symbols in your current document.
My life as Flashdeveloper changed. For some Flash is already dead since ages, but for me it’s an important part of my fulltime job. In the meanwhile I start to like Haxe and will share some thoughts on Flash, and the workflow of two mobile projects build with Haxe / Flambe.
 While approaching the deadline of House of Anubis (game), MediaMonks needed a tool that helps with randomizing tiles. The levels has a huge amount of walls and tiles in it’s library, since it is build in Flash with MovieClips on stage. For the quick win, this simple tool allowed to randomize selected clips on stage with a selection from our library. Of course; to refine it, you’ll need more than just a MovieClip swapping tool, but we love to share this tool with you anyway in case you need it.
 When you have a selection with multiple MovieClips, you sometimes want to transform (rotate, skew, move, scale) them all, but individually. By default, Flash will transform them like it is one object. I created a tool for that. Just select some items on stage, call the command and set the adjustments. It is also possible to transform them relative from its current transformation.
 This tool is useful for Actionscript developers; it grabs all objects with instance names from the current timeline and outputs a list with Actionscript code in the output-window. Available in two flavors.
 This tool automatically renames layers and cleans empty layers. This tool should be used as neurotic as you would use the save-button, and you will have perfectly named layers. We have included a free nazi-tool which detects if you’re using txt or mc as prefix for your instance names, according our MediaMonks coding standards.
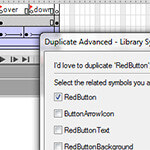 Ever wanted to duplicate a symbol timeline with all of its instances? In Flash, if you do a duplicate of a library item, it does not offer to duplicate its children too, you have to do it manually. Another annoying thing; it does not copy the class references. That’s why I created a tool that does it all. It asks you to give a pre- or postfix for the new names, or you can choose to replace parts of the names.
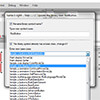 his tool is made to easily assign or change the class of a MovieClip, and uses our naming standards for the linkage names (which is filename dot SymbolName). It also gives you the option to change the instance name over the full timeline and fixes the layer name. The tool has a class-dropdown, pre-filled with Temple-classes, and the classes that are already linked to library symbols in your current document.
 My life as Flashdeveloper changed. For some Flash is already dead since ages, but for me it’s an important part of my fulltime job. In the meanwhile I start to like Haxe and will share some thoughts on Flash, and the workflow of two mobile projects build with Haxe / Flambe.