Photoshop pixelart coloring tip
I recently created a pixelart game scene for fun and tried a
sophisticated way to allow testing different colors. I’d love to share how I did this.
How to apply gradient mapping

There we go, I started drawing the pixelart with this black and white palette.
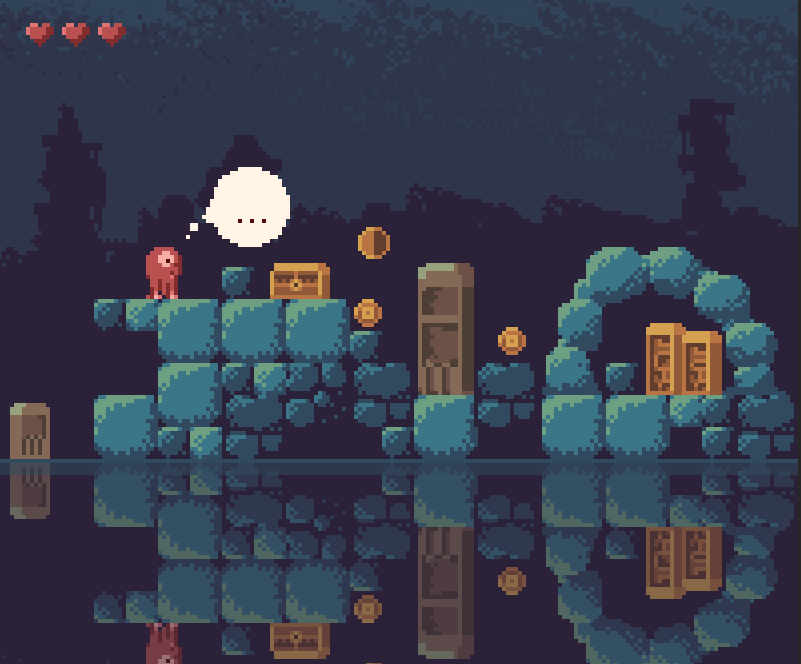
As you can see I only used just 5 colors. This is exactly how my complete image is drawn. Without any of the grading, it looks like this:

If you take a moment to break down the final image and look at the coloring, you’ll notice there are 4 color types available, which I’ve organized like this:

I organized all my elements in layer folders. Each layer folder gets its own gradient mapping, which is how the coloring is applied. The structure looks like this:

You can add a gradient map layer in Photoshop: Layer > New Adjustment Layer > Gradient Map
Move the new adjustment layer above the layer folder.
With the clipping mask it will only apply to the content of that folder. This is a super useful feature!
Use this adjustment layer as clipping mask for the layer folder. Select Layer > Create Clipping Mask
The fun thing is that it allows to change the mood of the image per layer easily.


While I haven’t actually converted the assets to a game (and probably won’t ever), in theory you could apply a similar concept procedurally, to change from summer to winter, from day to night etc if you would work with just grayscale assets.
This concept of gradient mapping also works for non-pixelart and can be really cool if the art itself has gradients for example. I hope this inspires someone else for its game / art.